
A little bit about SMTP
Role of fake SMTP server DebugMail: how and when it’s useful
— Enhancing email testing: simplify and streamline with DebugMail
What is this guide about?
Before getting started
Installing Golang
— Downloading Golang
— Write PATH for Go
— Performing a check
DebugMail account
Writing application code
— What the DebugMail snippet code contains
In Summary
Conclusion
A little bit about SMTP
When you send emails from your application to customer’s email addresses, you need to use an outgoing mail server. The outgoing mail server can be Google, Mailjet, Unisender, or other services. Alternatively, you can configure your own SMTP server, such as using Postfix.
Regardless of the option you choose from the above, you will still use the SMTP protocol to send emails. This means that it doesn’t matter which programming language you use to write your application. You will still be able to send emails to your customers by simply using the SMTP protocol.
Either you use a SMTP-library to send emails, or you can work directly at the SMTP level itself.
Role of fake SMTP server DebugMail: how and when it’s useful
Even after setting up an outgoing mail server and being ready to send emails, you would most likely want to test the logic of sending your emails to clients, especially if the logic is specific. After all, you wouldn’t want your clients to receive incorrect emails or incorrect data in those emails. Clients don’t appreciate it when we make mistakes.
Enhancing email testing: simplify and streamline with DebugMail
Here, you have at least two options — manually create multiple real email accounts to test your outgoing emails or use a Fake SMTP server to simplify the process and avoid the hassle of creating numerous real email accounts.
DebugMail is precisely such a Fake SMTP server. This means that DebugMail does not deliver emails to real recipients; it only captures and saves them in your DebugMail project, where you can analyze your emails and identify errors or inaccuracies. This eliminates the need to create thousands of real email accounts to simulate your customers and greatly simplifies your work.
Just like any other real outgoing mail server, DebugMail works with the SMTP protocol. This means that you can use DebugMail in your projects regardless of the programming language your application is written in, and the method of connecting to DebugMail or a real mail service will be the same.
We recommend using DebugMail in the staging environment of your application so that you can easily and quickly test outgoing emails if there have been any changes in the logic of their operation.
Imagine how convenient it is — you make changes to the logic of outgoing emails, the logic of generating email content, or the logic of selecting recipients.
- You need to make sure everything is working correctly.
- You deploy updates to the staging environment where DebugMail is connected and quickly test all the cases related to outgoing emails — you don’t need to register new email accounts or add/change user addresses in your application.
- You simply test your outgoing emails without any hassle.
What is this guide about?
As mentioned above, it doesn’t matter which programming language you use for your application. If you need to work with outbound email, you will use the SMTP protocol, which can be used from any programming language. This can be implemented using a library, or it can be direct interaction with your server via SMTP protocol.
Specifically in this guide will show a simple example of how to use DebugMail in your Golang projects. You will create an account in the DebugMail service and write basic Golang code that allows you to send emails from your application, with all these sent emails being stored in our DebugMail space. From there, you can easily analyze these emails and identify any errors or inaccuracies.
In this guide, we assume that your application may not be related to the WEB or HTTP, but still needs to send outbound email. Therefore, we will only write a simple function that sends an email. Essentially, you need to modify and reuse this function in your own application.
This guide is more like a demonstration of how to use DebugMail in your Golang projects using the net/smtp library.
It will provide a simple example, but based on this example, you will understand the working principle and be able to apply it to your Golang application, regardless of its size, complexity, or purpose.
Of course, this example requires some improvements, and it’s better not to use it as is. However, for a simple demonstration, this example is suitable. It will give you an idea of how to use an SMTP server in your code. If you understand the concept and have an understanding of how to construct programs correctly, you can easily adapt this example for your application.
Before getting started
Since we will be working with Golang in this guide, we need to install all the necessary dependencies, create an account and project in the DebugMail service.
We will demonstrate the example using the Ubuntu operating system, although the specific OS doesn’t matter. You can do the same with some caveats on other operating system.
Installing Golang
1 – Downloading Golang
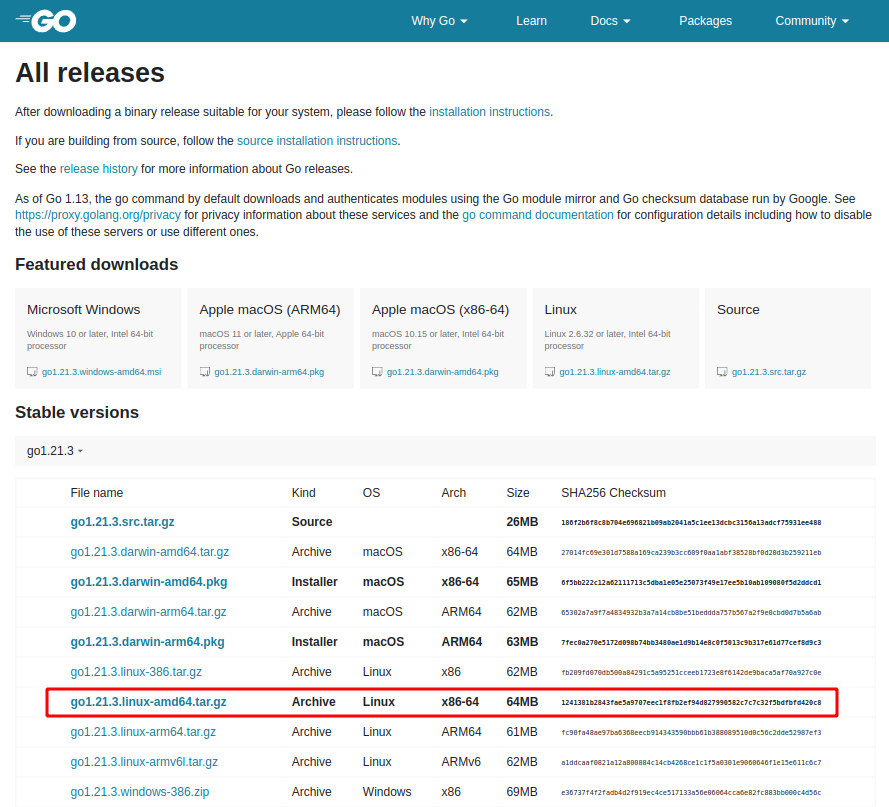
Visit the Golang website and download the latest version of the package — https://go.dev/doc/install.
Depending on your operating system, choose the package that suits your needs.
In our case we need this particular package:
Unpack the archive with the command:
sudo tar -C /usr/local -xvf go1.21.1.linux-amd64.tar.gz2 – Write PATH for Go
Open the next file:
sudo nano ~/.profileAt the end of the file, add the lines:
export PATH=$PATH:/usr/local/go/binTo save, press Ctrl+O then Enter.
3 – Performing a check
In the terminal, type:
source ~/.profileNext, in the terminal, type:
go versionIf you get the output go version go1.21.1 linux/amd64, it means everything is fine and you can continue with your task.
If not, identify any errors made during the Go installation process or use Google to find installation instructions for Golang on your system. This shouldn’t be difficult.
Our main task is to install the Go compiler on your system.
DebugMail account
After installing Go, you must first create an account on DebugMail and then create a project to use the DebugMail mail server. By creating an account and project on DebugMail, you will obtain access credentials that you will use to send emails through the DebugMail mail server.
- Go to https://app.debugmail.io and complete the registration and email verification process.
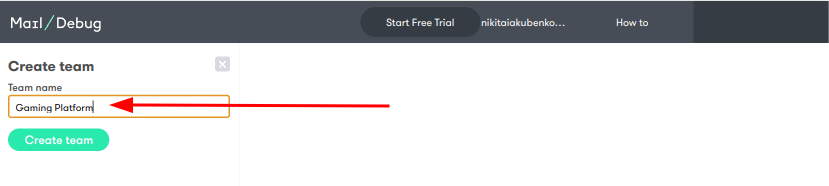
- After you log in to your profile for the first time, you will see a form that will allow you to create your team.
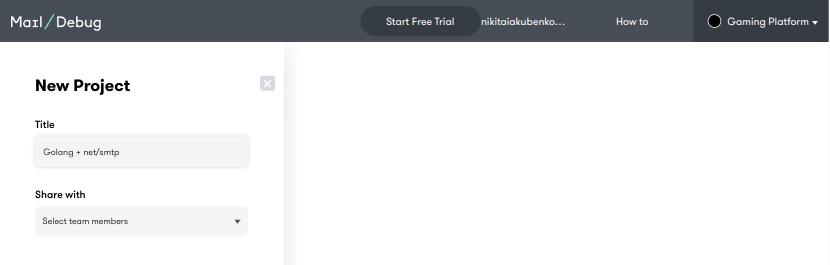
- Having created a team, you can now create projects within that team. The usual practice is to create a separate project in DebugMail for each application if you have multiple applications.
To create a new project, click on the «New projects» button in the lower-left corner of the screen. A project creation form will appear. Enter the name of your project and save it.
Now you should be able to see the project we have created:
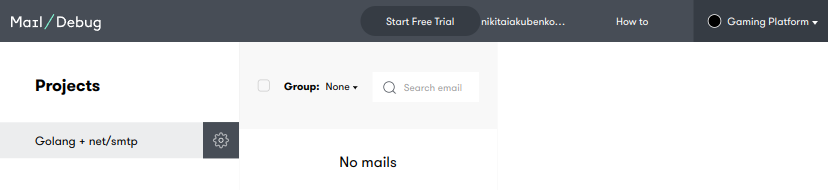
As you can observe, our project currently does not have any emails. It is high time to change that!
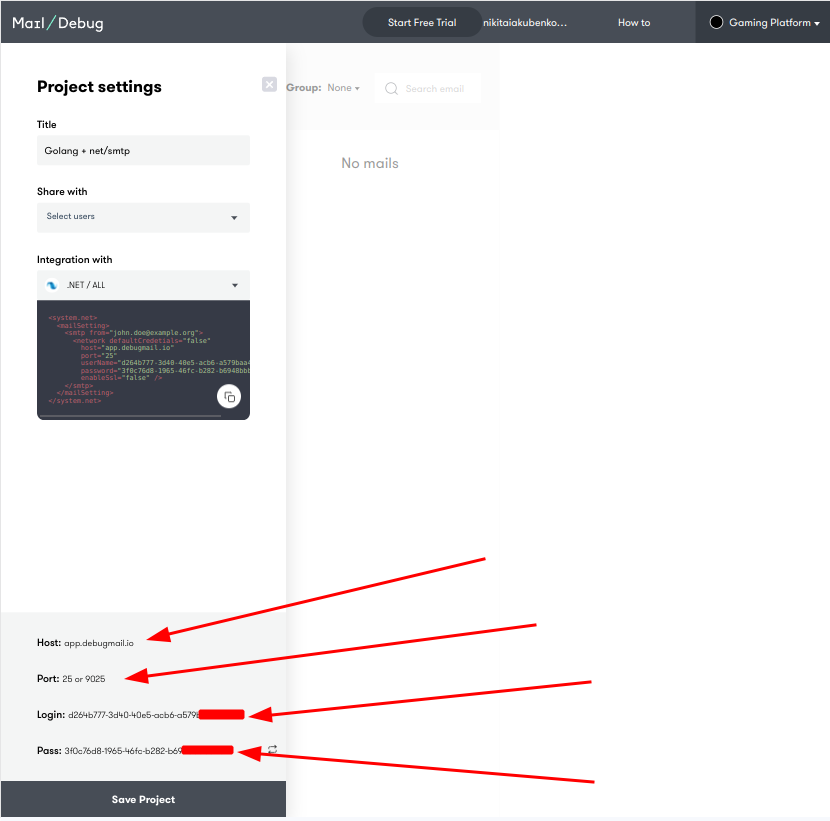
You need to collect all the data required for your Golang code to use DebugMail as an outgoing mail server.
- Tap on the gear icon ⚙ next to the project name.
- Open the Settings section.
You will find the host name, port number, username, and password. These are the data that you will be using in your Golang application.
Writing application code
Open your favorite IDE and create the necessary folder where your Golang application files will be stored.
In that folder, create a file called net_smtp.go and add the following code into it:
package main

import (
	"fmt"
	"net/smtp"
)

func main() {
	host :=
	port :=
	login :=
	pass :=

	auth := smtp.PlainAuth("", login, pass, host)
	to := []string{"client@example.com"}
	from := "no-reply@my-project.com"
	msg := []byte("From: no-reply@my-project.com\r\nTo: client@example.com\r\nSubject: Hello\r\n\r\nThis is the body of the email.\r\n")

	err := smtp.SendMail(fmt.Sprintf("%s:%d", host, port), auth, from, to, msg)

	if err != nil {
		fmt.Println("Error:", err)
		return
	}

	fmt.Println("Email sent successfully!")
}
Please note that the variables host, port, login, and pass are empty. You must provide the data you obtained after creating the project in DebugMail for these variables.
Let us complete this information.
Return to the DebugMail project, open the project settings, and copy the necessary data into the corresponding variables in the Golang code.
In our example, the code will look like this:
package main

import (
	"fmt"
	"net/smtp"
)

func main() {
	host := "app.debugmail.io" //insert project host
	port := 25 //insert project port
	login := "dacd64c6-91b9-48fa-850d-fc588a840472" //insert project login
	pass := "bce892d4-add3-47af-a9b4-abe050ddd6db" //insert project password

	auth := smtp.PlainAuth("", login, pass, host)
	to := []string{"client@example.com"}
	from := "no-reply@my-project.com"
	msg := []byte("From: no-reply@my-project.com\r\nTo: client@example.com\r\nSubject: Hello\r\n\r\nThis is the body of the email.\r\n")

	err := smtp.SendMail(fmt.Sprintf("%s:%d", host, port), auth, from, to, msg)

	if err != nil {
		fmt.Println("Error:", err)
		return
	}

	fmt.Println("Email sent successfully!")
}
In general, we are ready to run our application, which will send an email to our DebugMail project.
But before that, let’s take a more in-depth look at what is happening in our code.
What the DebugMail snippet code contains
package mainSpecify the name of our Golang package.
import (
	"fmt"
	"net/smtp"
)
Import the necessary libraries:
- fmt — allows messages to be output to the console.
- net/smtp — library for sending emails, which works at SMTP level.
func main()Declare the name of the function that will send messages to your DebugMail project. The rest of the code will be executed within this function.
host := "app.debugmail.io" //insert project host
	port := 25 //insert project port
	login := "dacd64c6-91b9-48fa-850d-fc588a840472" //insert project login
	pass := "bce892d4-add3-47af-a9b4-abe050ddd6db" //insert project password
In this section of the code, we define variables that contain the data needed by the net/smtp library to connect to the DebugMail mail server.
auth := smtp.PlainAuth("", login, pass, host)
	to := []string{"client@example.com"}
	from := "no-reply@my-project.com"
	msg := []byte("From: no-reply@my-project.com\r\nTo: client@example.com\r\nSubject: Hello\r\n\r\nThis is the body of the email.\r\n")
Here, we create an auth object that will be used for authentication during the connection to the DebugMail server. We also specify the email addresses to which we want to send the email. Additionally, we specify the body of the email itself and the From and To headers.
err := smtp.SendMail(fmt.Sprintf("%s:%d", host, port), auth, from, to, msg)On this line, we attempt to send the email.
if err != nil {
		fmt.Println("Error:", err)
		return
	}
This code checks for any errors that may have occurred when sending the email. If an error is found, the error message will be printed to the console and the function will be terminated.
fmt.Println("Email sent successfully!")If no errors were found, we will display a message to the console indicating that the email was successfully sent.
Now that you understand what the code does, you need to make sure that you have entered the host, port, login, and password data correctly in the code and run it. A test email should appear in the DebugMail project.
Let’s return to the terminal, open the folder with your file net_smtp.go, and run the command:
go run net_smtp.goIf you have done everything correctly, you will get the following output:
Email sent successfully!Now move on to your DebugMail project. You will see a list of emails there.
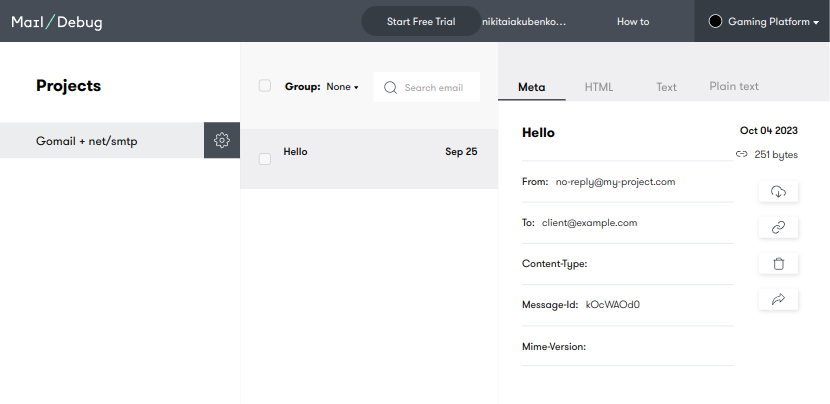
Opening the email, you see that it is the email that you sent from the Golang application.
It works!
In Summary
This guide provides a basic example of how to use DebugMail in your Golang applications using the net/smtp library.
You should understand that headers, body, and other email parameters were not discussed in this guide, as that is a separate topic. This guide aims to demonstrate the basic principle of outgoing mail in your applications.
If you understand the idea of this guide, you will be able to implement any SMTP server for outbound mail in your application, including DebugMail.
DebugMail server is used for debugging your mail at the staging environment of your project.
Furthermore, the DebugMail server is not used for actually sending mail to your clients.
Conclusion
To summarize, if you want to send email messages from your application, you will need an outgoing mail SMTP server. All outgoing mail SMTP servers work on the same principle, through the SMTP protocol.
If you want to test or debug outgoing emails from your application, you will need a service called DebugMail, a fake SMTP server.
We recommend following this principles:
- Connect DebugMail to the staging environment of your application so that you can quickly and easily test outgoing mail and any changes related to outgoing mail.
- Connect a real SMTP server to the production environment of your application that will deliver real emails to your clients.
By following this principle, you can easily modify the logic of your outgoing mail, test these changes using DebugMail, and only deliver your changes to production when you are confident that the outgoing mail in your application is working correctly.


