Testing email functionality using DebugMail with Rust

A little bit of information on SMTP
Role of fake SMTP server DebugMail: when and how can it help?
— Improve email testing: simplify and optimize with DebugMail
What’s this manual about?
Before starting the testing of the email functionality of the application
Installing Rust on your computer
— Downloading Rust and Cargo
— Checking installed versions of Rust and Cargo
Creating a project in DebugMail
Writing application code to connect to the fake SMTP server DebagMail
— Creating an application project
— Adding project dependencies
— Writing code to test the outgoing mail functionality of a Rust application
— Building an Rust application
— Running the application and testing email functionality
Afterword
Summary
Additional Resources
A little bit of information on SMTP
When sending emails from your application to customer’s email addresses, you have the option to utilize various outgoing mail servers such as Google, Mailjet, Unisender, or other similar services. Additionally, you can also configure and use your own SMTP server, for example, by employing Postfix.
Regardless of the above options, the underlying protocol you will be using to send emails remains SMTP. This means that it doesn’t matter which programming language you choose to develop your application in; you will still be able to send emails to your customers by simply leveraging the SMTP protocol. You have two approaches to achieve this:
- Either by incorporating an SMTP library within your application to handle email sending,
- Or by directly working with the SMTP protocol at a more granular level.
Role of fake SMTP server DebugMail: when and how can it help?
Even after configuring an outgoing mail server and preparing to send emails, it is crucial to thoroughly test the email sending logic, especially if it involves specific criteria. It is important to ensure that your clients receive accurate emails containing correct data. Making mistakes in this aspect can lead to dissatisfaction among clients, as they understandably expect accurate and error-free communication from us.
Improve email testing: simplify and optimize with DebugMail
In this scenario, you have two options to test your outgoing emails:
- Manually creating multiple real email accounts can be time-consuming and cumbersome.
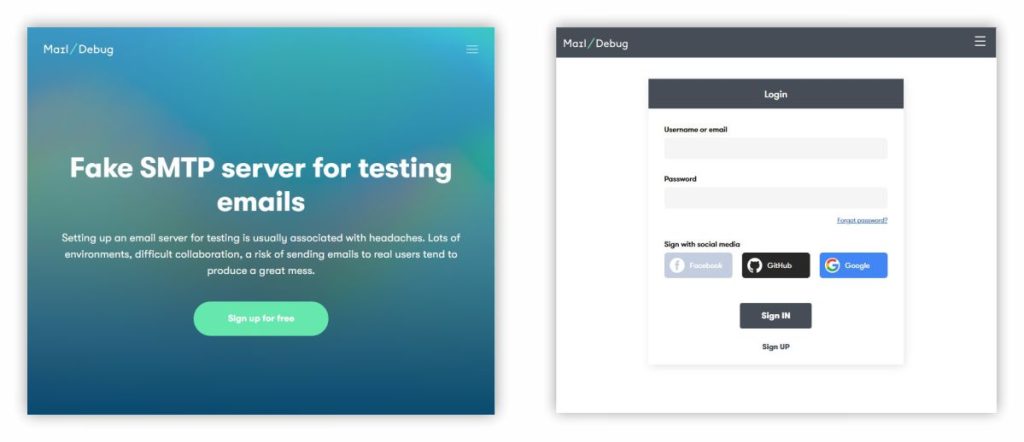
- An alternative option is to use a Fake SMTP server like DebugMail, which simplifies the process and eliminates the need for creating numerous real email accounts.
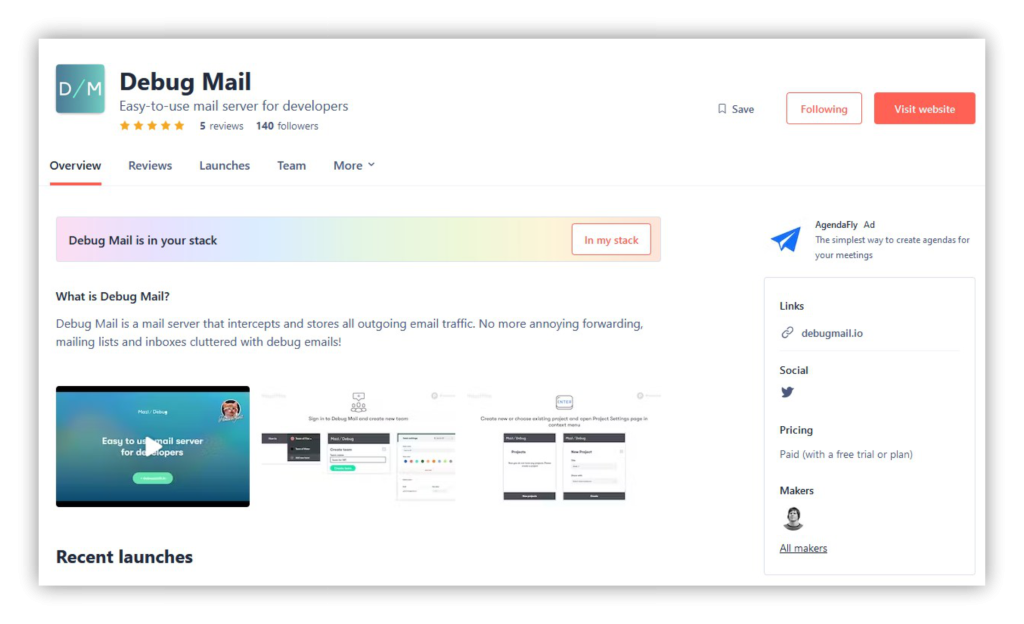
DebugMail specifically functions as a Fake SMTP server, meaning it doesn’t deliver emails to actual recipients. Instead, it captures and stores these emails within your DebugMail project, allowing you to analyze and identify any errors or inaccuracies. This eliminates the hassle of creating multiple real email accounts to simulate real customers and makes your work much easier.
Similar to a genuine outgoing mail server, DebugMail works with the SMTP protocol. This enables you to incorporate it into your projects regardless of the programming language used. Connecting to DebugMail or a real mail service follows the same method.
We recommend using DebugMail in the staging of your application development, so that you can easily and quickly test outgoing emails if there have been any changes in its logic. Just imagine how convenient it would be — you make changes to the logic of sending emails, the logic of composing email content, or the logic of selecting recipients. You need to make sure that everything is working correctly. By deploying updates to the staging environment where DebugMail is connected, you can quickly test all the scenarios related to outgoing emails — no need to register new mailboxes or add/change user addresses in your application. You can simply test your outgoing emails without any hassle.
What’s this manual about?
As it was said above — it doesn’t matter what language you use to write your application. If you need to work with outgoing mail, you will use the SMTP protocol, which can be handled from any language. This can be implemented using a library, or it can be direct communication via SMTP with your server.
Specifically this manual will show a simple example of how you can use DebugMail in your Rust projects. We will create an account in DebugMail service and write a simple code in Rust that will allow us to send emails from the application. And all these sent emails will be stored in your DebugMail space. From where you can easily and simply analyze these emails and find errors or inaccuracies.
In this tutorial we will be using the Rust language and its package manager Cargo.
Before starting the testing of the email functionality of the application
Since in this manual we will be working with Rust and its package manager Cargo, first you need to install everything we need, as well as create an account and a project in the DebugMail service.
We will be demonstrating an example using Ubuntu OS. The OS doesn’t matter much though. You can do all the same things but with some caveats on any other OS.
Installing Rust on your computer
1 – Downloading Rust and Cargo
Open the terminal and go to the convenient folder where you will work and write our code.
Let’s upload Rust and Cargo on command:
curl --proto '=https' --tlsv1.2 https://sh.rustup.rs -sSf | shThe file will be downloaded and the Rust installation will start. During the process, you will be asked which installation option you want → choose option 1 (default installation).
After the installation is complete, you should see the message in the console:
Rust is installed now. Great!2 – Checking installed versions of Rust and Cargo
Let’s check the Rust version:
rustc --versionIf Rust has been installed correctly, then you should see something like this:
rustc 1.72.1 (d5c2e9c34 2023-09-13)- If that is the case, everything is fine and you can proceed.
- If not, find an error in the Rust installation process and fix it.
Let’s check the Cargo version:
cargo --versionWith Cargo installed correctly, you should see something like:
cargo 1.72.1 (103a7ff2e 2023-08-15)- If that is the case, everything is fine and you can proceed.
- If not, find an error in the Rust installation process and fix it.
Our main goal is to install the Rust compiler and Cargo package manager on your system.
If Rust or Cargo did not install correctly — find an error made during the Rust and Cargo installation process, or search Google for instructions on how to install Rust and Cargo on your system. It shouldn’t be difficult.
Creating a project in DebugMail
After installing Rust, you need to create an account on DebugMail. When you create an account, a team and a project, you will get access credentials that you will use to send emails through the DebugMail mail server.
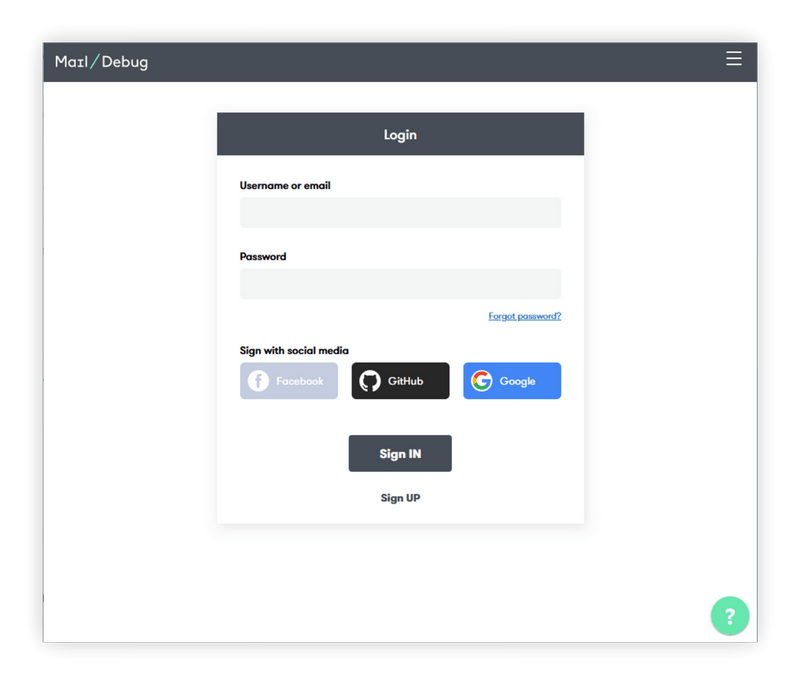
- Go to https://app.debugmail.io and register and confirm your mail.
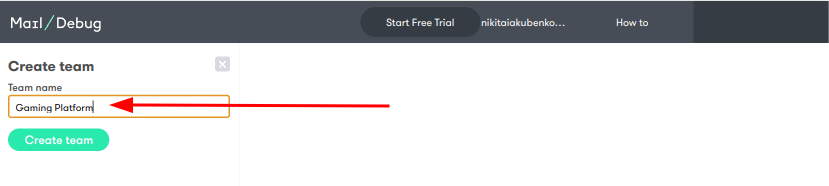
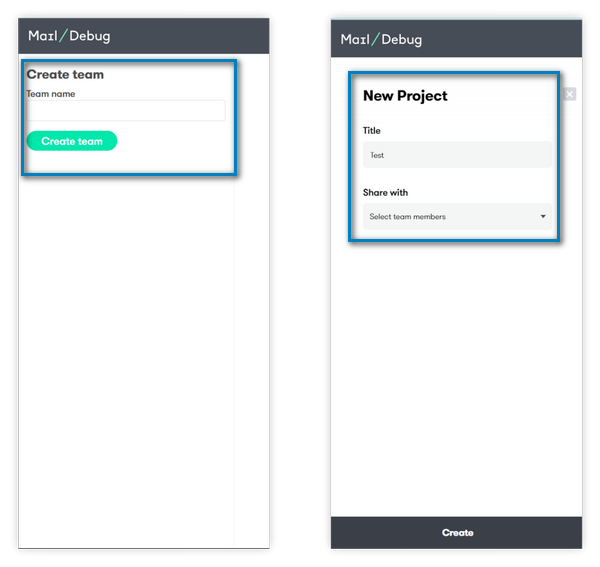
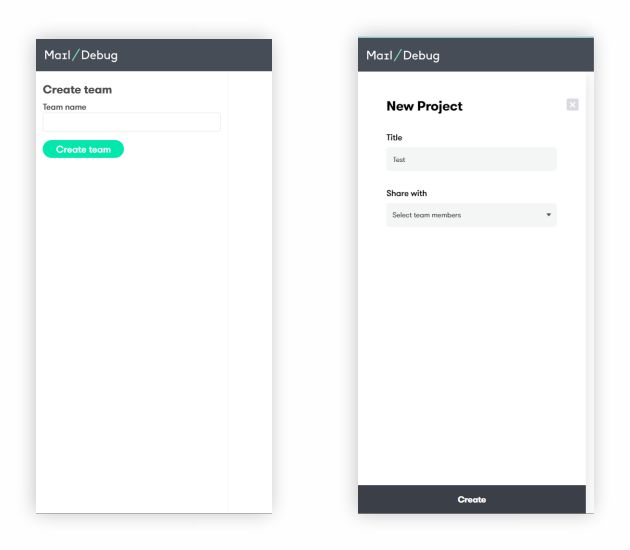
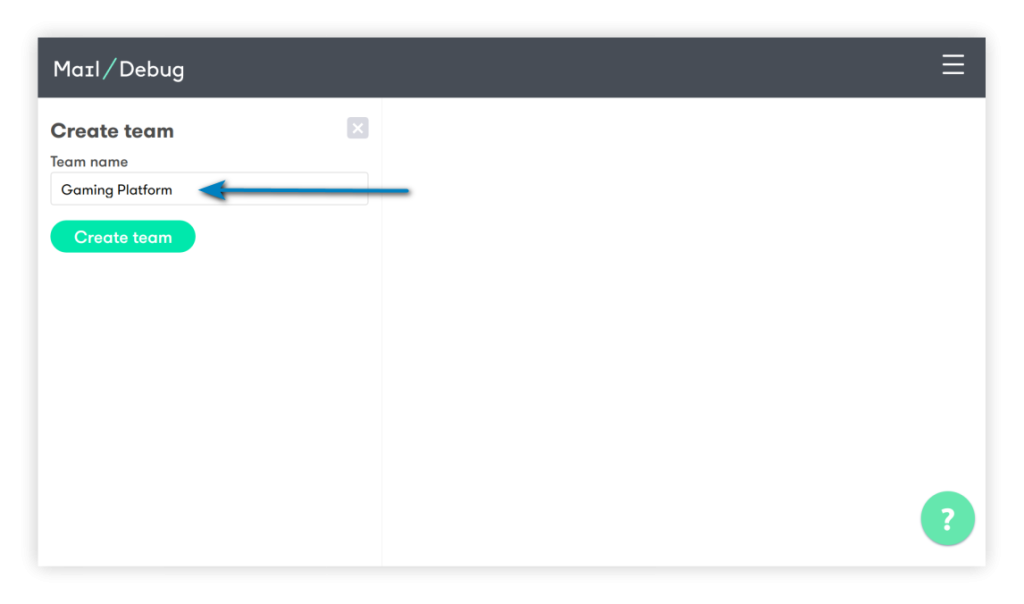
- Upon first login to your profile, you will see a form to create your team.
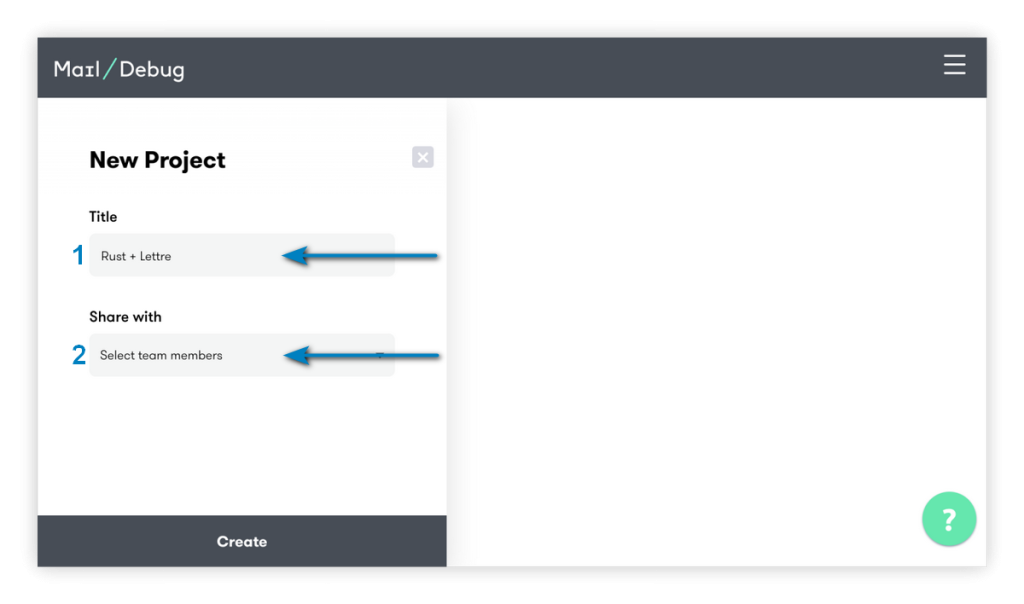
- Now that you have a team, you can create projects inside this command. Normally, the logic is that if you have several applications, a project in DebugMail is created for each application.
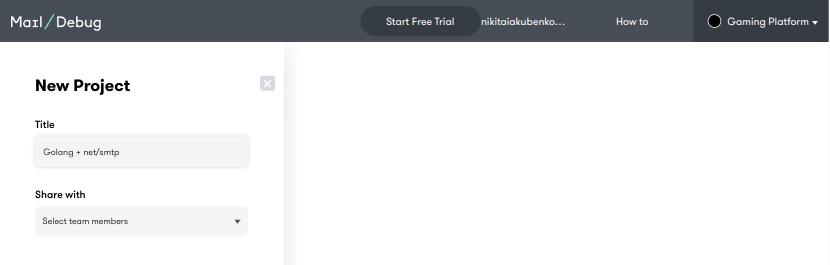
Let’s create the project. Find the «New projects» button in the lower left corner of the screen and click on it. You will see the form of creation of the project. Enter the project name, save it.
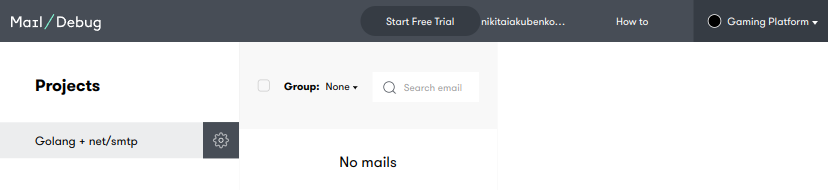
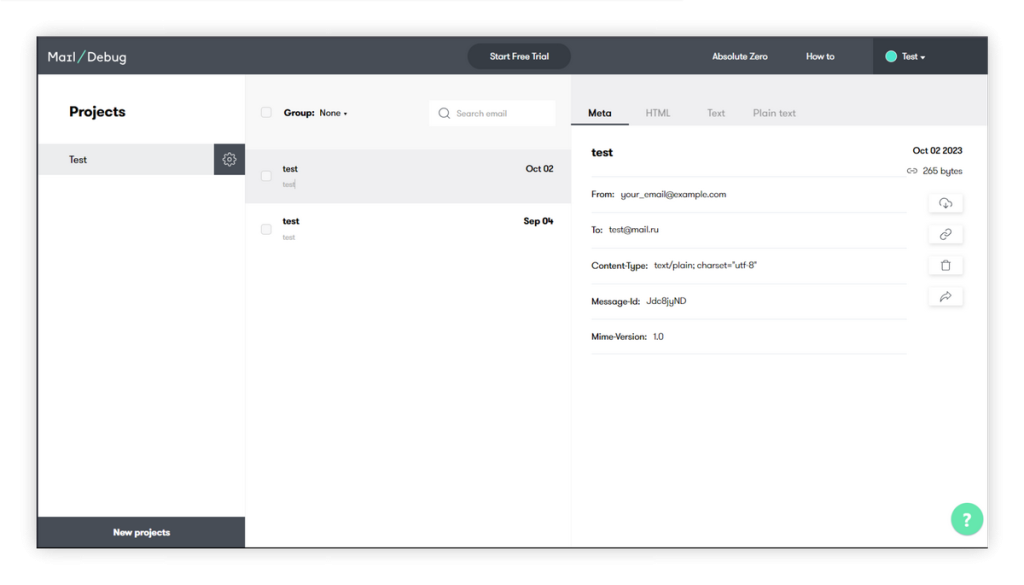
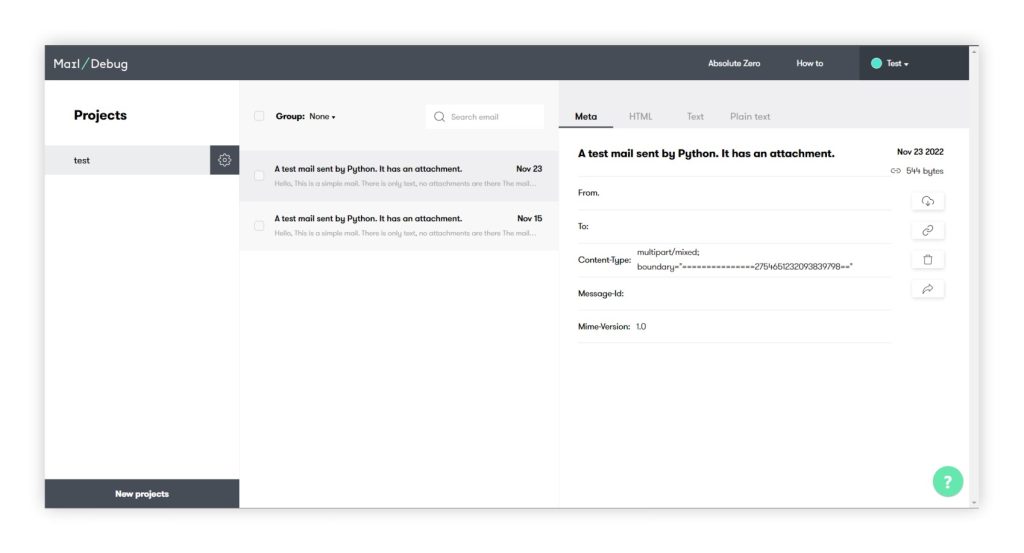
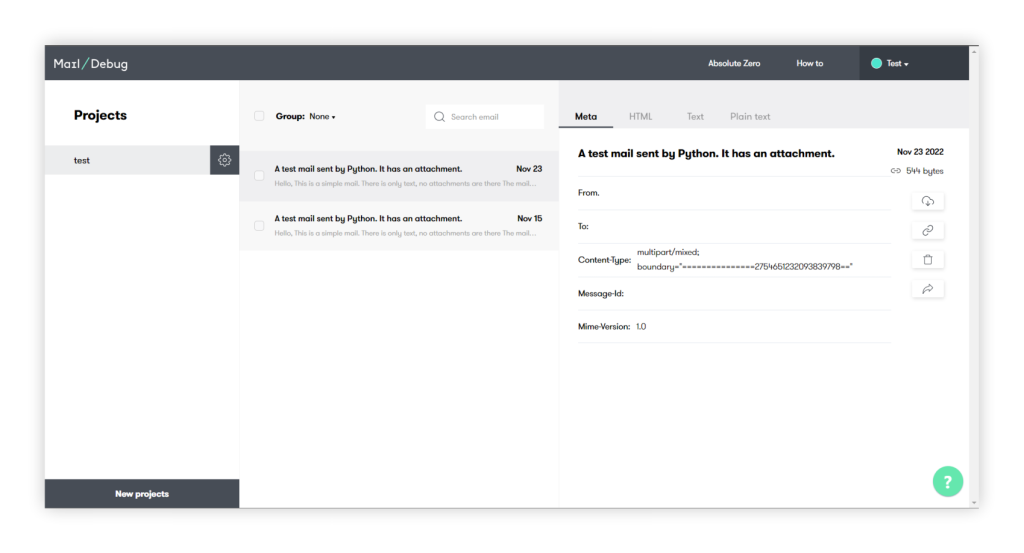
Now you should see your created project:
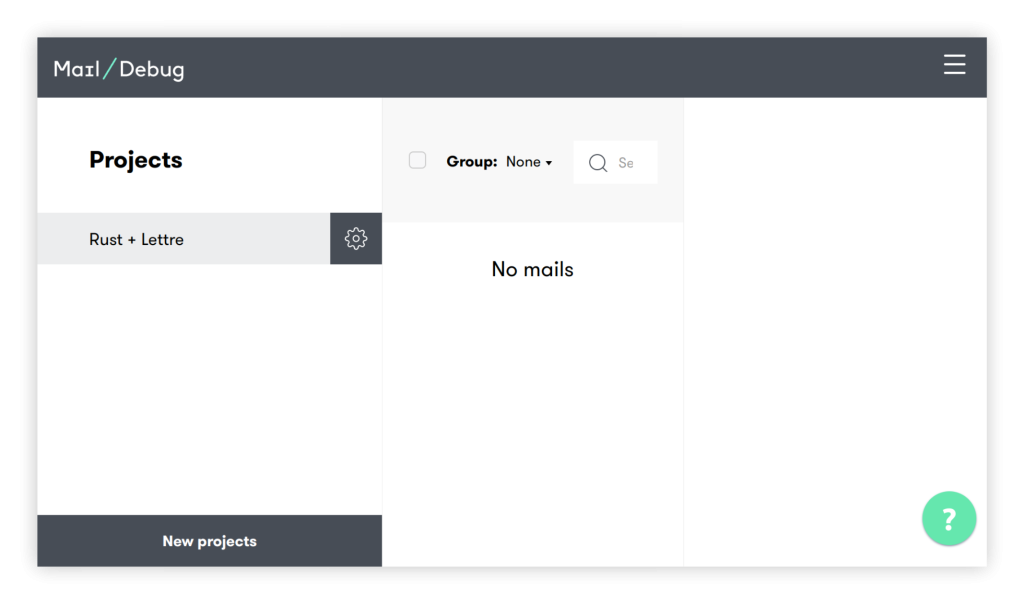
As you can see, your project doesn’t have any emails yet. It’s time to fix it!
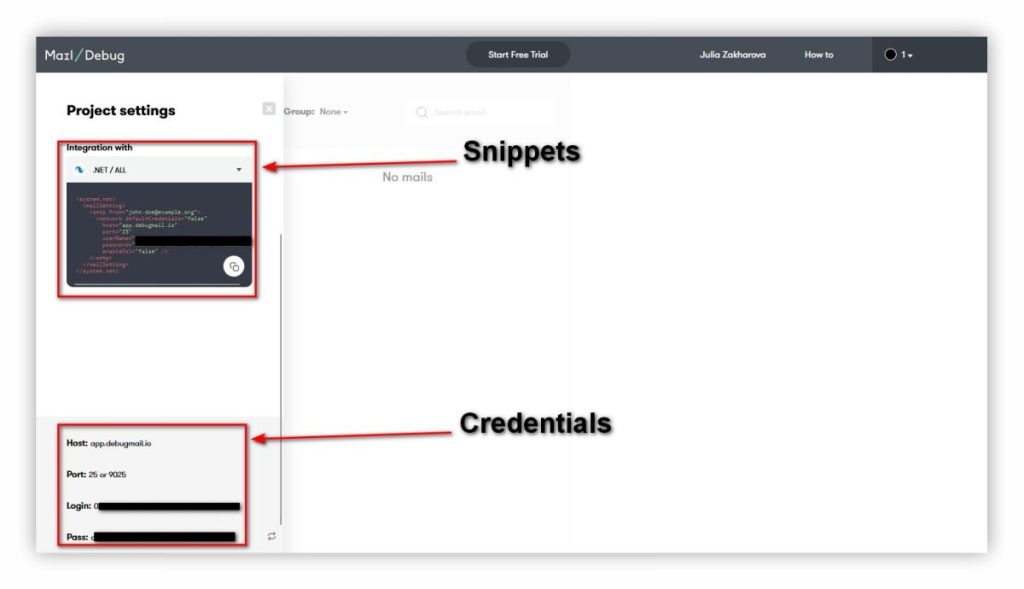
You need to obtain the necessary data that will be required in your Rust code to use DebugMail as your outgoing mail server.
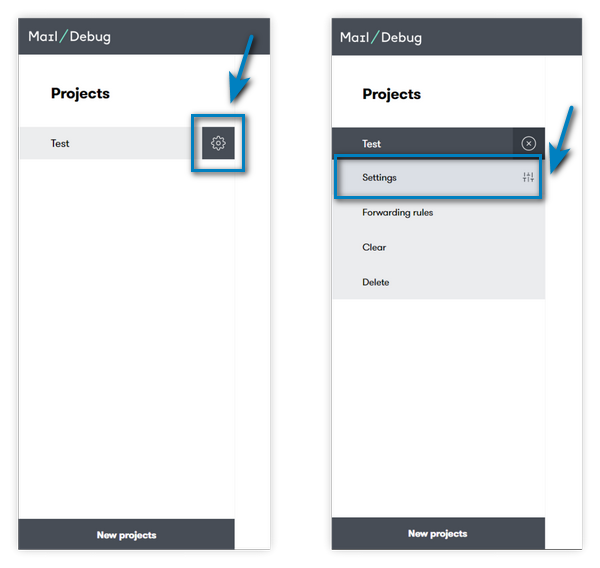
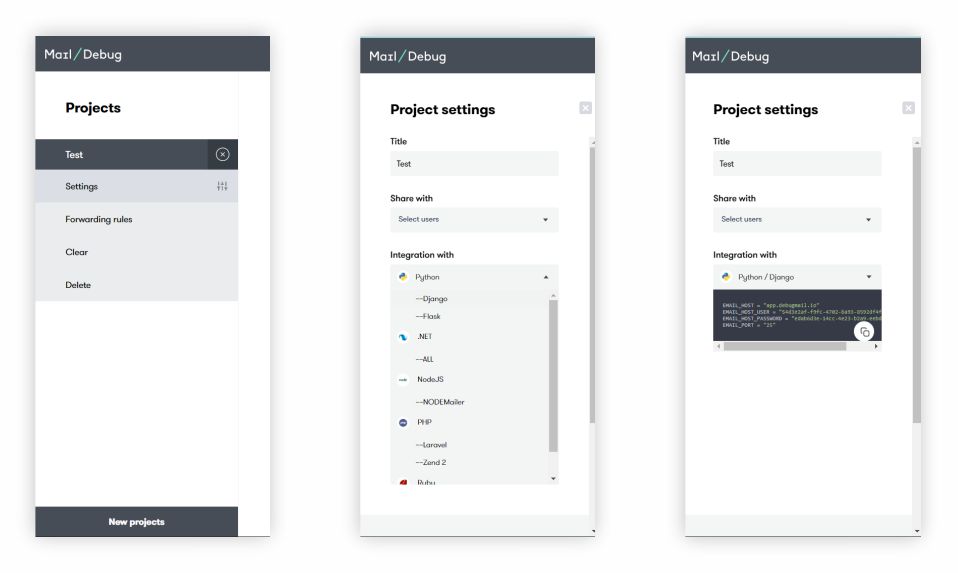
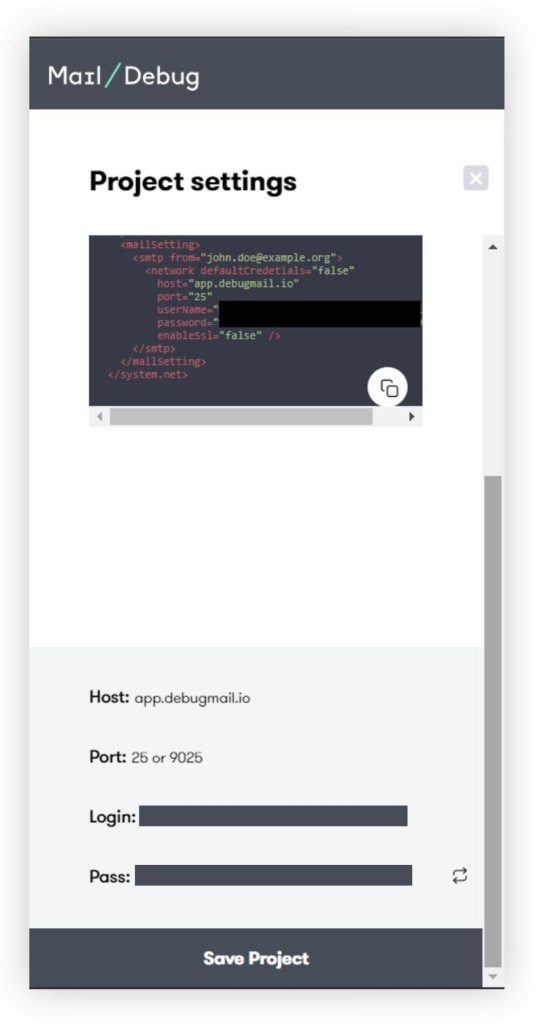
- Tap on the gear icon ⚙ next to the project name.
- Open the «Settings» section.
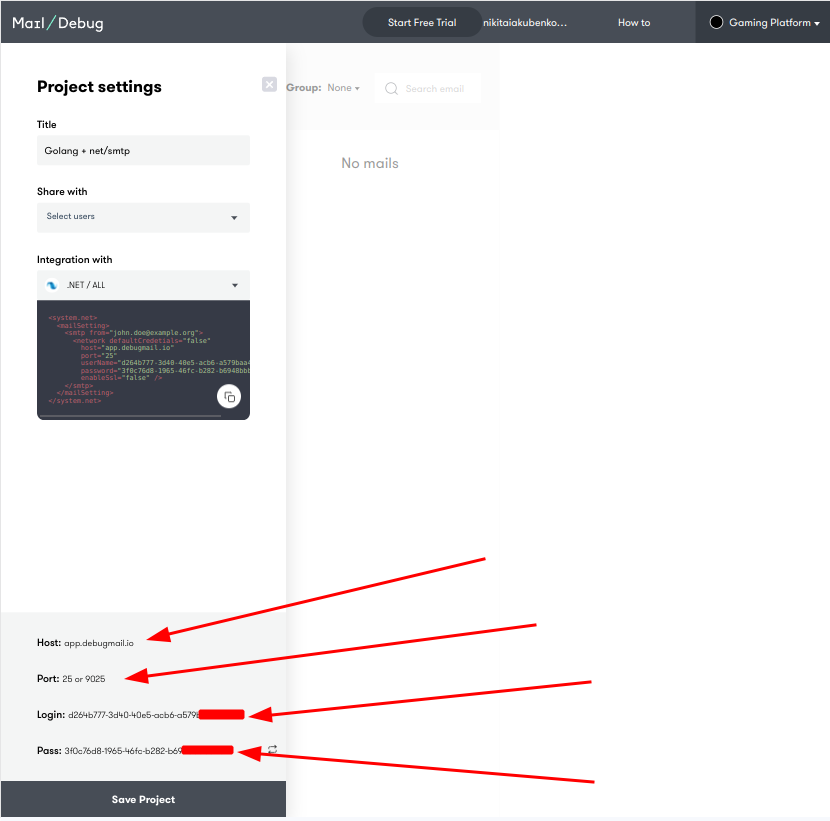
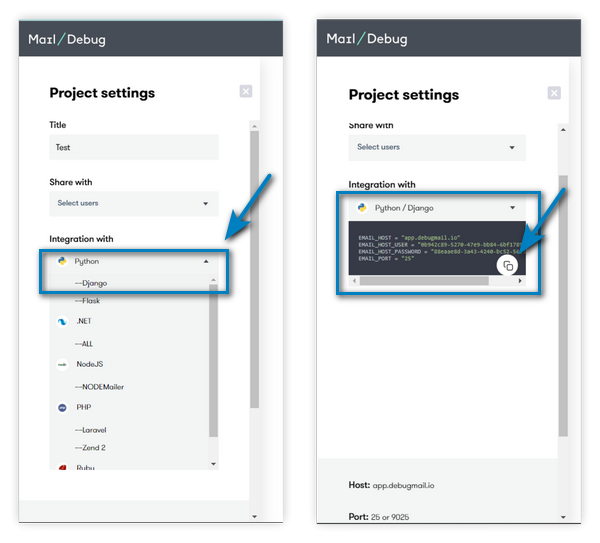
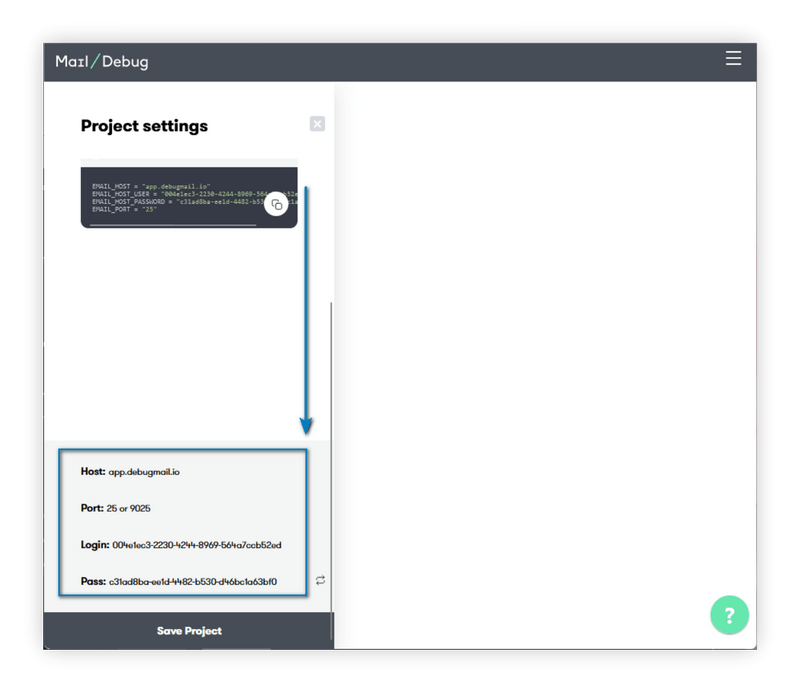
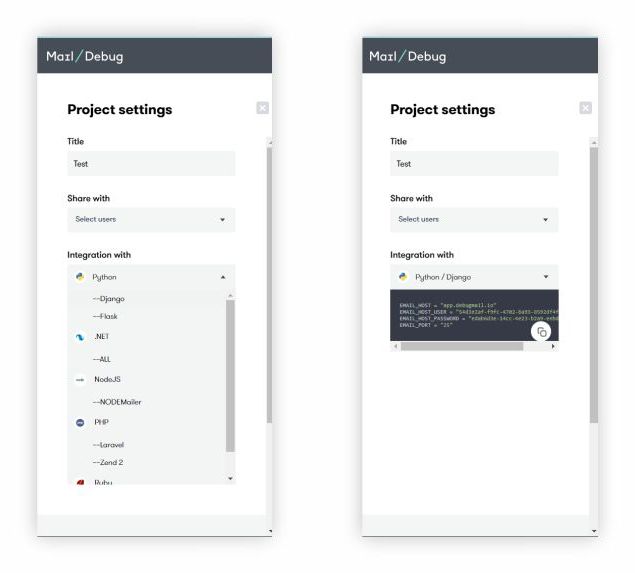
In the «Project settings» menu at the bottom you will see host, port, login, and pass. You use this data in your Rust application.
Writing application code to connect to the fake SMTP server DebagMail
1 – Creating an application project
Open the terminal in the folder where you will be developing your Rust application and run the command:
cargo new dm2_test_mailThis command will create a «skeleton» for your future Rust application. In our example, we decided to name the application dm2_test_mail. Although you can name it as you like.
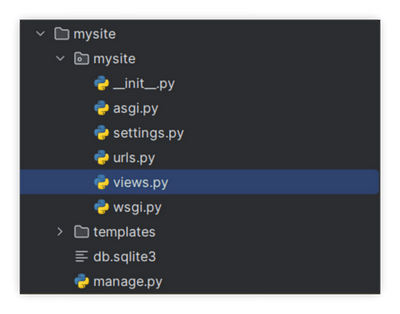
Now open the created folder with the project in your favorite IDE.
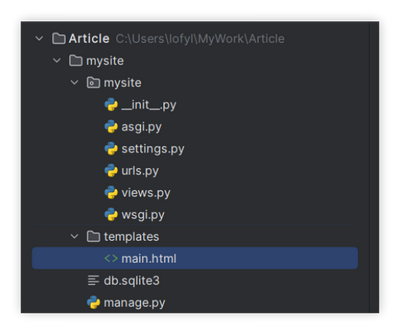
In the folder with your project (our — dm2_test_mail) you will see a folder called «src» — it will contain your source files Rust.
Now this folder has main.rs. In this file we will write our code.
2- Adding project dependencies
Since your Rust application will use the Lettre library to work with SMTP, you need to specify this library in the project dependencies.
Open the Cargo.toml file and change the dependencies section to:
[dependencies]
lettre = "0.10"
lettre_email = "0.9"
Save the changes.
3 – Writing code to test the outgoing mail functionality of a Rust application
Open the main.rs file in the src folder and paste the following code into it:
use lettre::{
    message::header::ContentType, transport::smtp::authentication::Credentials, Message,
    SmtpTransport, Transport,
};

fn main() {

    let email = Message::builder()
        .from("no-reply@example.com".parse().unwrap())
        .reply_to("suport@example.com".parse().unwrap())
        .to("customer@company.com".parse().unwrap())
        .subject("Send email for Rust app")
        .header(ContentType::TEXT_PLAIN)
        .body(String::from("It really works?"))
        .unwrap();

    let creds = Credentials::new("8f3f072e-dfb4-482c-85c5-b7e90883ad3d".to_owned(), "5b8834bf-780f-4a7a-b172-f787c3782440".to_owned());

    let mailer = SmtpTransport::builder_dangerous("app.debugmail.io")
        .port(25)
        .credentials(creds)
        .build();

    // Send the email
    match mailer.send(&email) {
        Ok(_) => println!("Email sent successfully!"),
        Err(e) => panic!("Could not send email: {e:?}"),
    }
}
Let’s explore what’s happening in our code.
use lettre::{
    message::header::ContentType, transport::smtp::authentication::Credentials, Message,
    SmtpTransport, Transport,
};
We specify which objects we will be using from the Lettre library.
fn main() {Here we declare the main function, where the message sending will occur.
    let email = Message::builder()
        .from("no-reply@example.com".parse().unwrap())
        .reply_to("suport@example.com".parse().unwrap())
        .to("customer@company.com".parse().unwrap())
        .subject("Send email for Rust app")
        .header(ContentType::TEXT_PLAIN)
        .body(String::from("It really works?"))
        .unwrap();
We create a Message object and specify the following parameters:
from— the sender of our email.reply_to— the email address where the recipient should send a reply if they want to respond to this email.to— the recipient’s email address.subject— the subject of the email.header— we add a ContentType header specifying the type as text/plain.body— the body of the email.
let creds = Credentials::new("8f3f072e-dfb4-482c-85c5-b7e90883ad3d".to_owned(), "5b8834bf-780f-4a7a-b172-f787c3782440".to_owned());In here we create a Credentials object and provide our credentials for the DebugMail project. We need to specify the login and password for the outgoing mail server that we want to use.
Where are the creds in the DebugMail project?
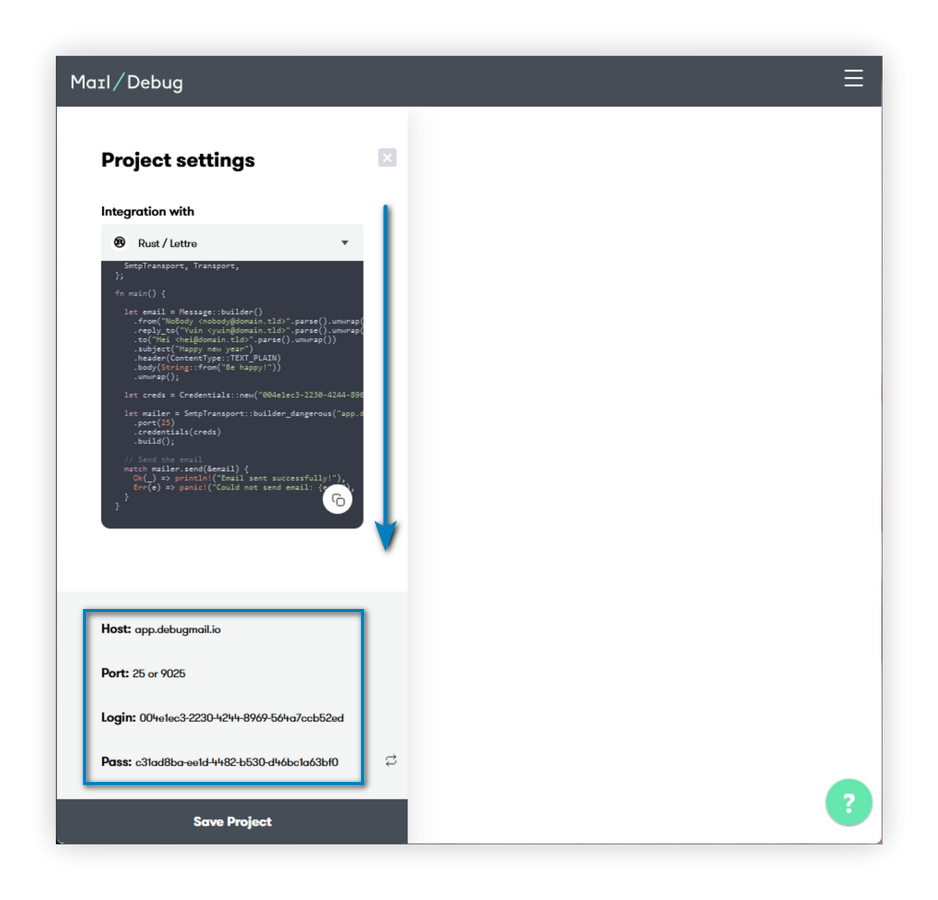
Go to your DebugMail project, open the project settings, at the lowest bottom you will see the necessary data. You need to replace the login and password used in the code above with the login and password from your DebugMail project.
If you were using a different outgoing mail server, you would need to provide your login and password from that server.
    let mailer = SmtpTransport::builder_dangerous("app.debugmail.io")
        .port(25)
        .credentials(creds)
        .build();
In this section of code, we create a SmtpTransport object by passing it the host and port parameters of our mail server.
- If you are using DebugMail, you need to specify host = “app.debugmail.io”, port = 25 or 9025.
- If you were using a different outgoing mail server, you would need to specify a different host and port to match that server.
Also passed here is the creds object created earlier, which contains the login and password data for authenticating the user to DebugMail.
    // Send the email
    match mailer.send(&email) {
        Ok(_) => println!("Email sent successfully!"),
        Err(e) => panic!("Could not send email: {e:?}"),
    }
This section of the code will attempt to send an email with the data generated earlier.
- If the email is sent, the “Email sent successfully!” message will be displayed in the console.
- If an error occurs while sending the email, the message “Failed to send the email” with the error description will be displayed.
This is where the work of our program ends. All we have left to do is create our Rust app and run it.
4 – Building an Rust application
Open the terminal and navigate to the folder with your Rust application. In our case, we call it as dm2_test_mail.
Execute command:
cargo buildWe will acquire the necessary dependencies and proceed to compile your Rust application.
In the project folder (for us it is dm2_test_mail), you will see a new directory called «target». Your compiled application will be located in this folder. Specifically, in our case, the compiled application will reside in the directory — dm2_test_mail/target/debug/dm2_test_mail.
5 – Running the application and testing email functionality
Open the terminal and navigate to the Rust project folder.
Execute command:
cargo runThis command will execute our program.
If you did everything correctly earlier, you will get the output “Email sent successfully!”. And our DebugMail project will receive the email sent by the program.
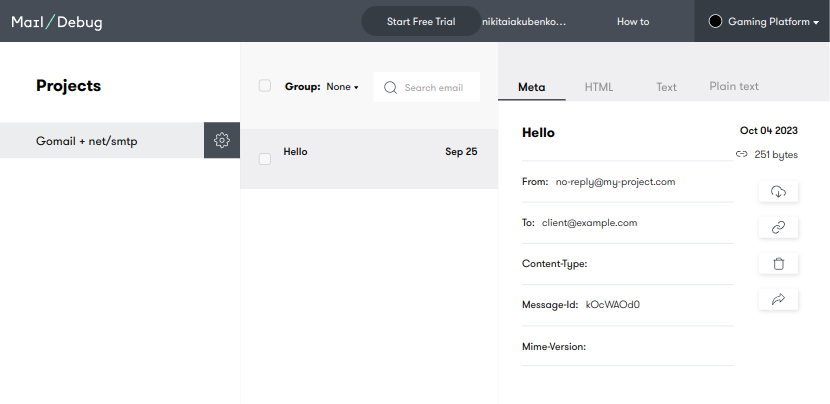
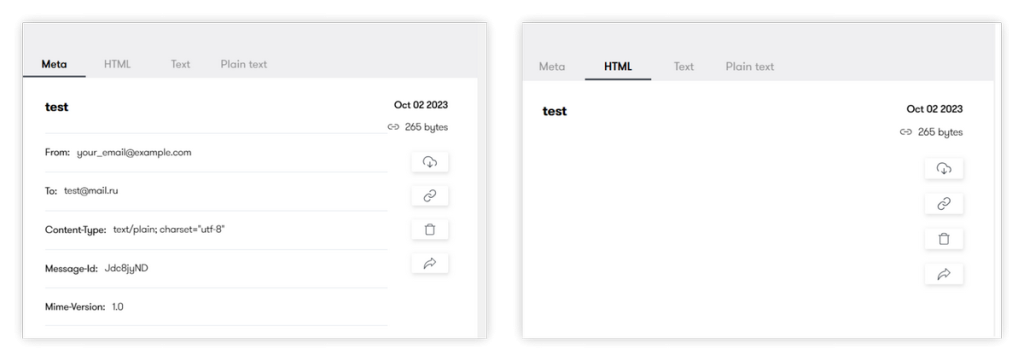
Let’s open our project in DebugMail and confirm that the email has been received as expected.
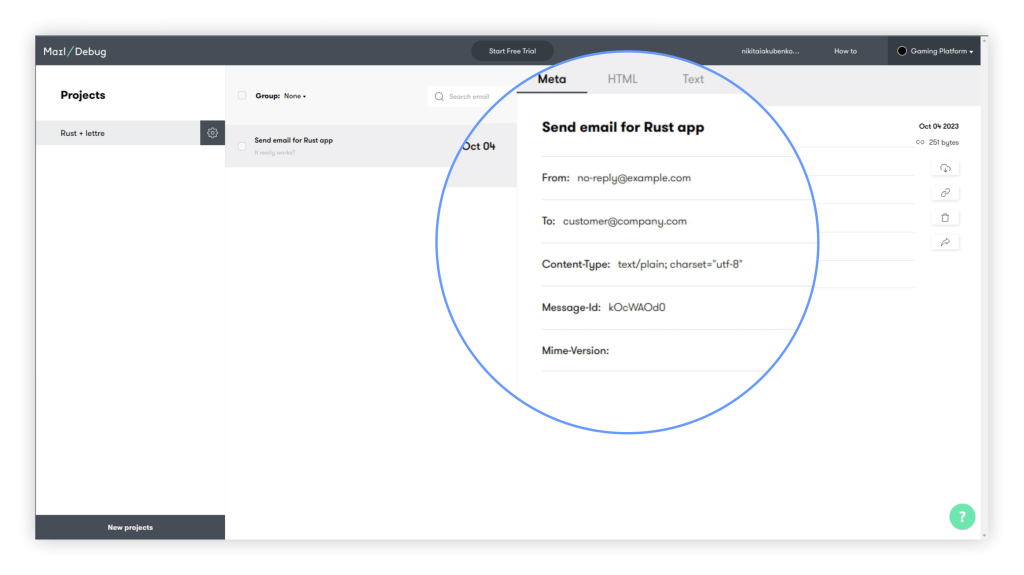
We’ve successfully achieved our goal! The email has arrived in our DebugMail project, thanks to the implementation of a simple Rust code that facilitates outgoing email sending. And we used DebugMail as our outgoing mail server.
It works!
Afterword
In this manual, we have provided a basic example of how you can use DebugMail in your Rust applications using the Lettre library. We were able to write a simple Rust code and send an email to a user. However, we used the DebugMail service as our outgoing mail server, which helps us easily and quickly test outgoing email from our application, written in any language.
If you have understood the concept of this guide, you will be able to integrate any SMTP outgoing mail server into your application, including DebugMail.
Summary
Let’s summarize.
- All SMTP outgoing mail servers work on the same principle — using the SMTP protocol.
- If you want to test outgoing email from your application or debug outgoing emails, you will need a service like DebugMail — a fake SMTP server.
- DebugMail server assists in debugging your mail during the staging of your project.
- DebugMail server is not intended for the actual delivery of emails to your customers. Its primary purpose is for debugging and testing during the development stage of your project.
We recommend following this principle:
- For the staging phase of your application, connect DebugMail so that you can quickly and easily test outgoing emails and any changes related to outgoing email functionality.
- For the production stage of your application, connect a real SMTP server that will deliver real emails to your customers.
By following this principle, you can easily modify the logic of your outgoing email, test these changes using DebugMail, and only deliver your changes to production when you are confident that the outgoing email in your application is working correctly.
If you have any questions or need help with integration, just email us. We are always ready to help!
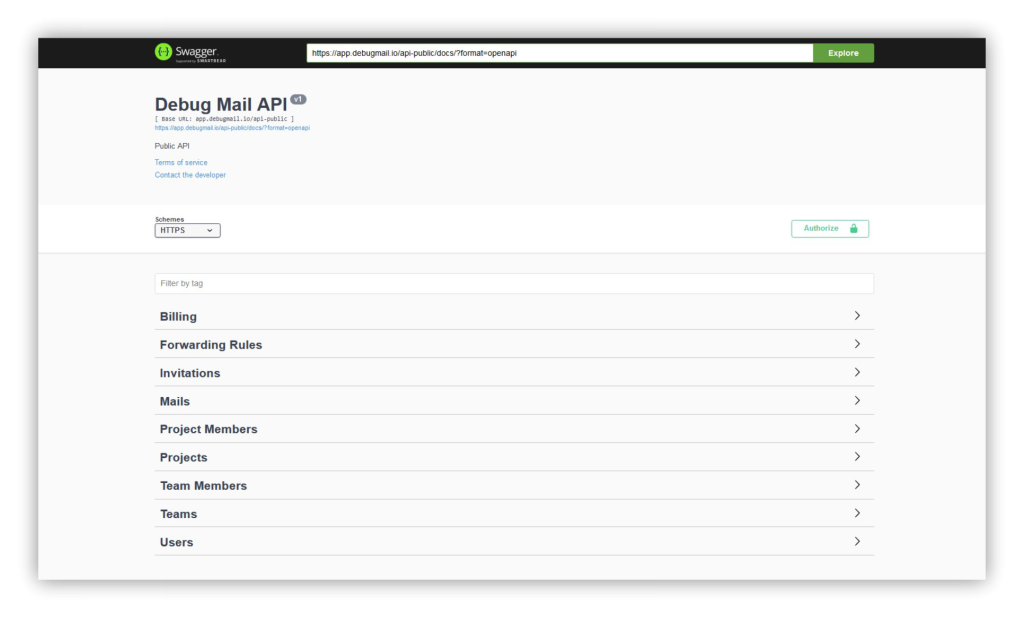
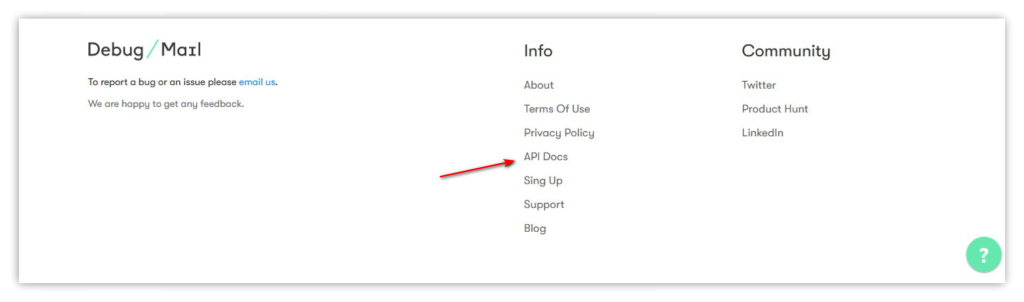
Additional Resource
- DebugMail API Documentation: https://app.debugmail.io/api-public/docs/